

Welcome back everyone, I've got some more Tips and Tricks for you all regarding lineart. We'll be covering how to make use of textured brushes, custom brushes and how to use color to your advantage when working with lineart!
With that intro out of the way, let's get started!
1. Use appropriate brush for YOUR style!
There is sort of a joke among artists, where viewers or fans will ask “What brush do you use?” This question is met with enthusiasm or dread, but the answer really does matter. What pen DO you use? In the last article I talked about line weight and texture. Going back to that, you want to be sure you use a brush the aligns with the look that you want.
Whether you work traditionally or digitally, the tool that you use can make a difference. Every artist has a set of tools that they prefer, and can vary from brushes, to fine/multiliners, felt tip pens, BIC pens, even colored pencils and markers can all be used for lineart. It really depends on what you’d like to do.
I personally go between three main pens, a Jiwa-pen, Mapping pen and Hai-pen!

You can download and buy brushes from various websites, however for safety reasons, I would stick to the Clip studio asset store or getting packs directly from artists themselves.
If you aren’t getting the results that you like, consider trying out new tools. Bare in mind that it might take time to adjust to a new tool, so give it quite a few drawings and sketches to figure out if this tool works for you. Watch videos and tutorials on how to use it properly. Pay attention to the texture, the sensitivity, flow and density. A lot of these are actually settings and are customizable, so if you have a brush that you REALLY like, but it's not quite what you want, then you can probably adjust it to be just perfect! You can also save brushes in most software to share with others or use for yourself (of course, haha).
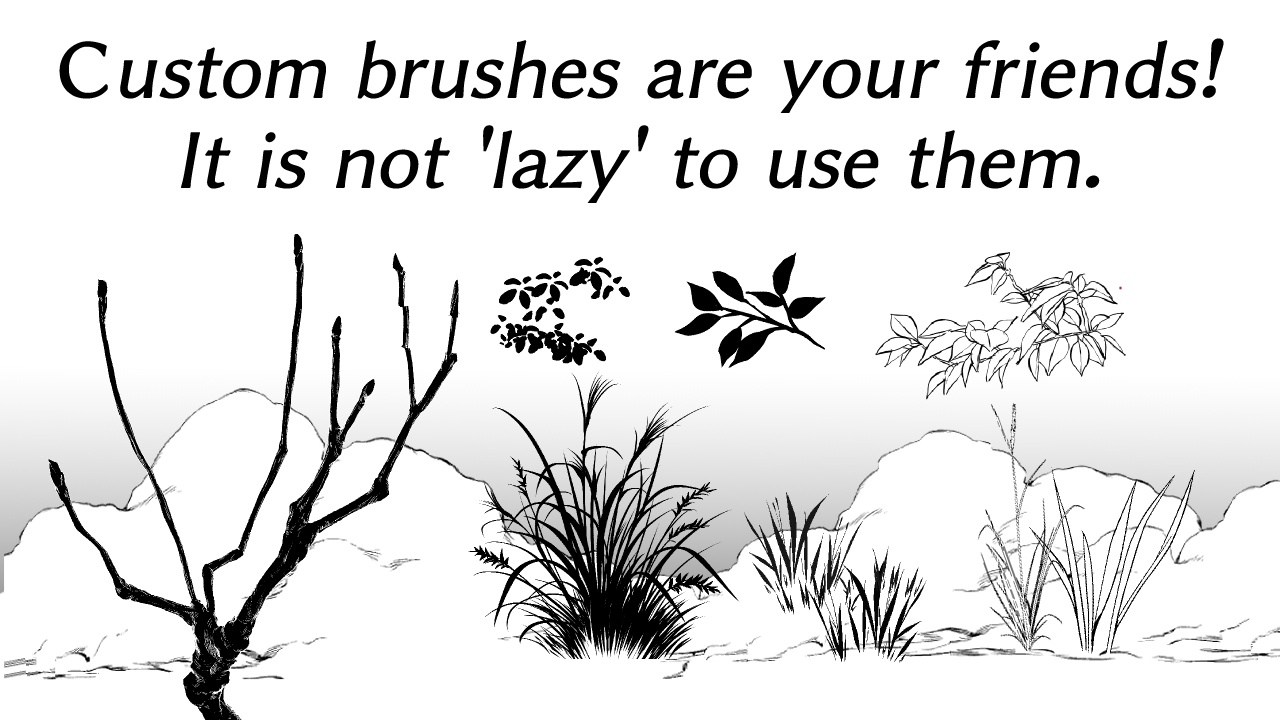
2. Custom Brushes to speed the process up
Along with different brushes that are textured, custom brushes are another way that artists can up the linework believe it or not! Custom brushes sort of have a stigma for being “lazy” or “boring”, however there are lots of ways to use them to your advantage by combining various brushes, erasing and more!
Like textured brushes, I would advise that you are careful where you get them from. Clip Studio has the asset store where you can download just about anything you can think of!
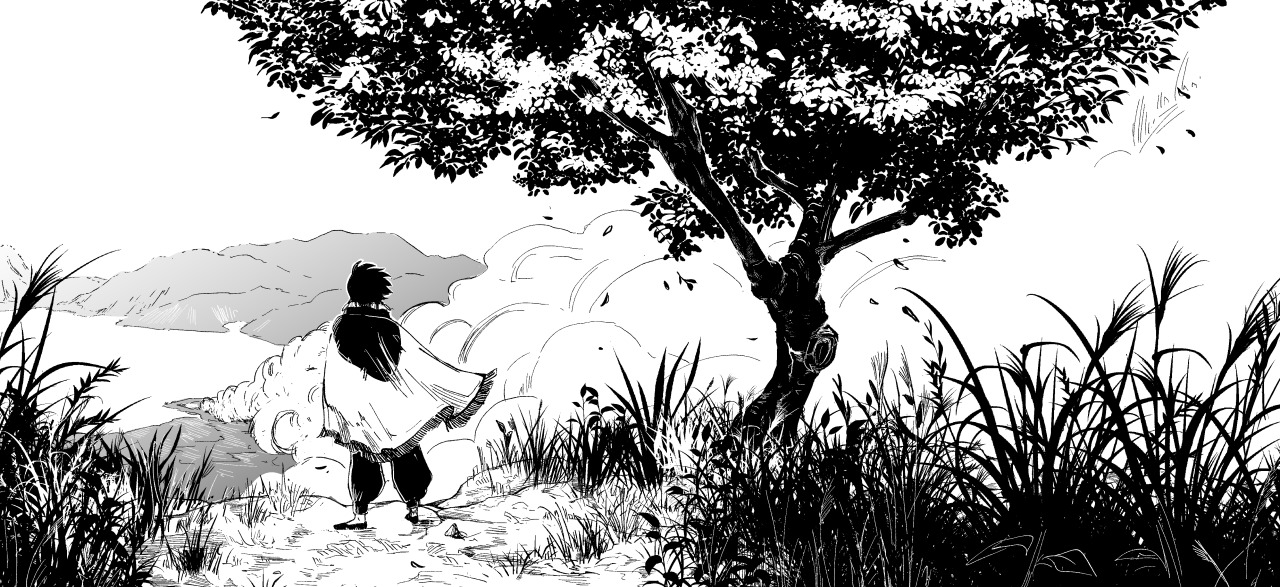
For example, in this particular panel, here are all the custom brushes I used
Being able to use custom brushes doesn’t just come down to stamping them and being done. I’ve learned that layering, erasing some parts, re-stamping, etc are a really good way to make custom brushes look more natural and be able to use them to speed up your drawing process. This is really helpful for backgrounds, jewelry, even hair, clothes, buildings, objects like paper, coins, etc. It can help things look consistent, we just don't want it TOO consistent.
If you are interested in covering this process (it's a lot of information), let me know! I'd love to cover it if it is something you all would be curious to know!
3. Use pen or curve tools and vector layers
Getting a straight line or -just- the right slightly-curved line is difficult. Traditional artists can use rulers and french curves and other stencil-like tools to aid in making such lines. Digital artists mostly likely have tools within their software to help them make just the right lines.
Those who work in Photoshop have the pen/bezier tool to create points and edit the lines between those points. Those who work in Clip Studio have the direct draw (in the same area as the speedline tool). Inside are a variety of vector drawing tools, some for straight lines, curved lines and premade shapes. It’s very helpful to get clean and neat lines!
I personally don't use this tool, but I've seen some amazing things come from it! Vector and vector layers in general are very powerful tools as they allow for the manipulation and resizing of lineart without any pixelation or distortion! The tutorial "Level Up Your Lineart" is very helpful in explaining how these work and I would highly recommend it for everyone!

4. Colored Sketches
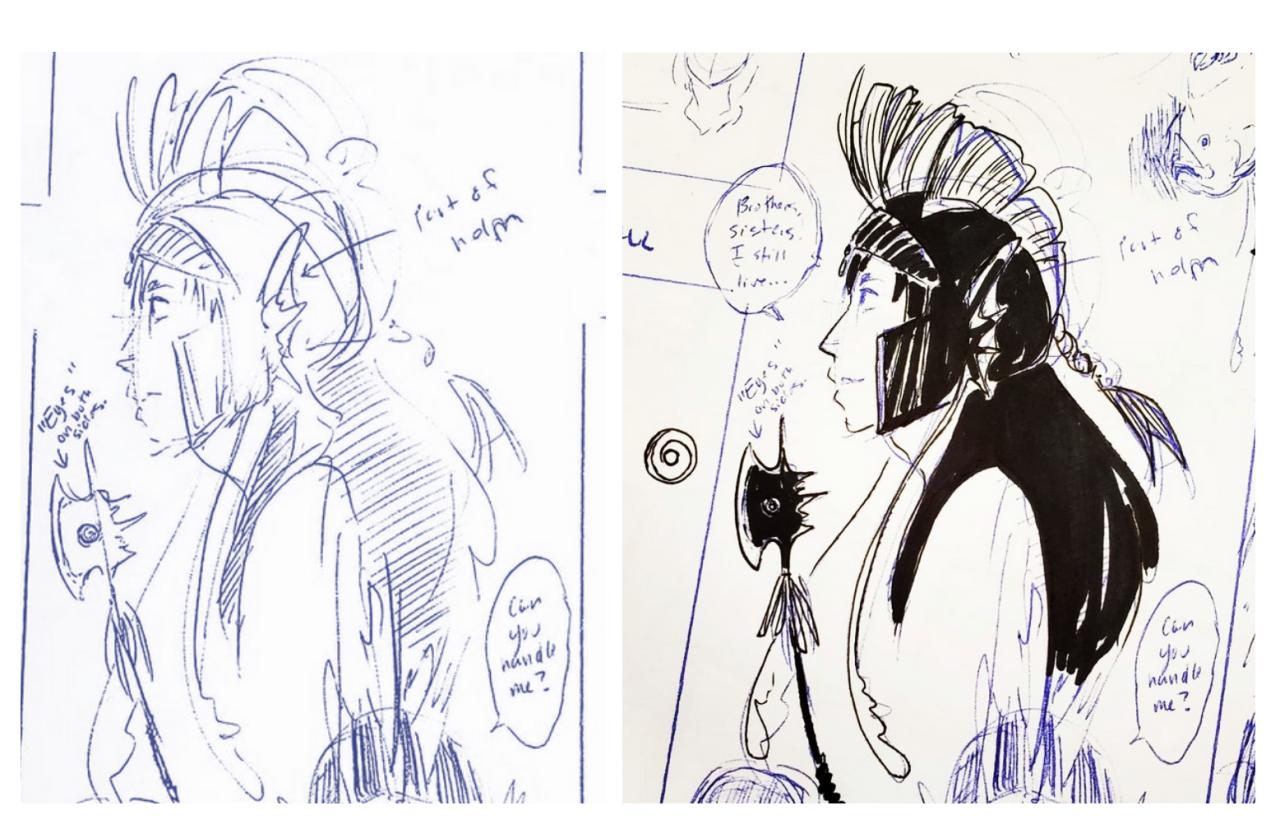
It might seem like a weird solution, but it is a tradition! A lot of comic creators will draw with a light blue called "non-repro blue" or "non-photo blue". It is called this because if you ink over this blue pencil and scan with the right settings, the colored lines will not be visible in the scans (or most of them)! You can buy these pencils still and even mechanical pencil ink in this specific color. A lot of comic paper has this color used for the guidelines so that when scanned it won't interfere with the artwork. The website and store "Blue Line" is famous for supplies all kinds of tools like this for traditional artists, so be sure to check our resources below.

I personally have taken this to my digital drawing habits as well! Having a lighter color that isn't grey helps me see my sketch and separate it from my lineart. For whatever reason, I really struggle to ink on top of grey, so if you struggle too, try using a different color. It doesn't have to be blue! I've also used red or green depending on the need. I'll also sometimes make different elements different colors to be able to tell them apart! For example, skin could be blue, clothes could be red, any magic or effects are green, etc.
5. Sketch in ink / markers to gain confidence
In the last article, I mentioned that practicing hatching and cross-hatching in ink is a good way to gain more confidence in inking and lineart. Another great tool involves breaking out the traditional tools and sketching in ink, pens, brushes, and markers without using something more correctable like a pencil. For some people this could be very anxiety inducing, not having a way to "fix" something. However here me out:
A lack of confidence in inking is usually more-so a lack of confidence in making lines or strokes the way you want to make them. It's not necessarily that you feel you can't draw something, it's an anxiety about a specific part of the process. You don't have to draw anything specifically, it's more the action of drawing with something that you KNOW isn't easily fixable to get over the mental block of the process itself. In fact, it's BEST that you start with things that you are familiar with and enjoy drawing the most!
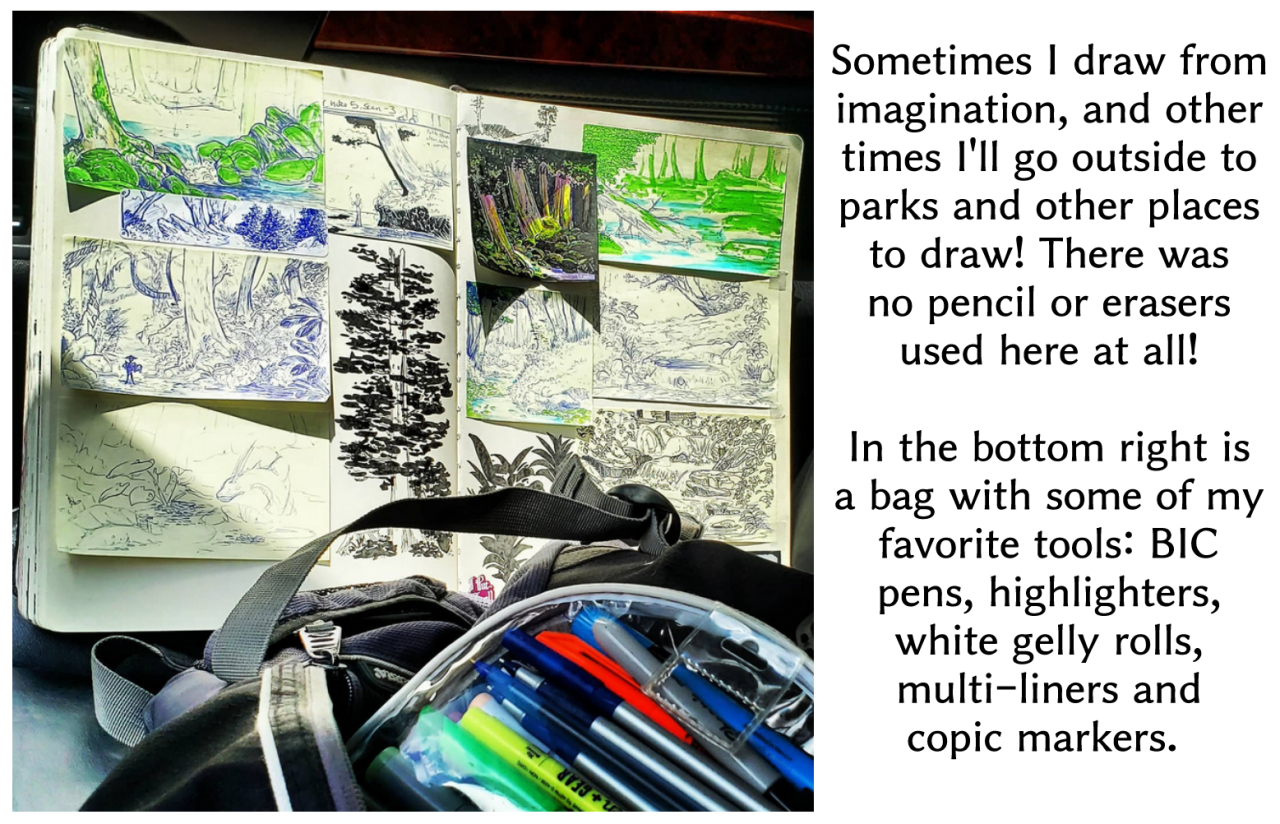
For a lot of us, that would be our characters! I personally love to draw landscapes and nature scenes! It's very calming and meditative to me now and I like to use it as a warm up process! My favorite tools are post it notes (varying size and drawing small so that I can't over detail) and a plain ole' BIC pen! Below I've got some samples of things I've drawn just as "ink practice". I started this process of "losing my fear" of inking back in 2013 thanks to one of my professors at Ringling College. I've kept up with his advice and suggestions and now it's a regular part of my day and habits!
Don't forget that you can always use more than one tool for inking! I love to use a BIC pen for a light sketch since they can get a lot of lights and darks depending on how you press. They are a lot like a pencil in that way. Then ink over it with another pen or brush! There are so many possibilities!
That's it folks! That was a lot of information and I hope that you can find some part of it valuable in your journey as an artist and creator. Inking is probably one of the most difficult parts of making the artwork itself. Like anything, it takes a lot of time to figure out how you want things to look, and then it can be even more challenging to stay consistent! Experimentation is the best way to learn new techniques and see what works and what doesn't. Once you find what works, it takes a lot of repetition to keep things that way and refine it until it becomes almost effortless!
I've gained a lot of confidence with ink and lineart over the years, so I'm really glad to be able to share my tips with you! As always, I have links to more resources below!
- Level Up Your LineArt
- Clean Line Art! Digital Inking Tips
- Lineart Tips for Digital Artists
- Blue Line Pro - Tools for Traditional Artists
- My Jiwa-Pen Brush for Clip Studio
- My Hai-Pen Brush for Clip Studio
Thank you all for reading, and I'll see you all next time!
~ ArtCrumbs and the Globalcomix Team