

We learned about Camera Angles in our last Tips and Tricks Article, today we are going to be focusing on Camera Position and the 180 Rule. These two topics go hand in hand, and it’s very important that we understand where to put the camera and when.
Camera Position refers to where the camera is placed -around- the subject. The 180 rule is an imaginary line storytellers use to help keep continuity when doing a multi character / multi subject scene. This helps with any back and forth interaction that may be occurring to help keep things clear and easy to understand. Like any rule, it has times it can be broken for great effect, so take this rule with salt.

With our Intro done, let's dig in!
Frontal View
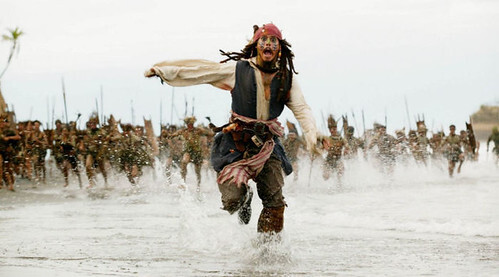
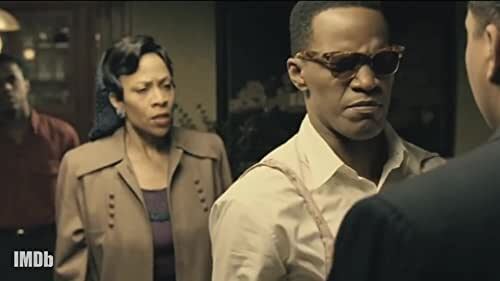
As it sounds, a Frontal shot is the front facing view of the character. It doesn’t have to be the face, just the front. Placing the camera in front of the subject tends to provide a subjective view, meaning the viewer feels that they are viewing the subject from the eyes of someone or something else. This is very helpful in conversations or direct interactions. With our first sample here, we have Jack Sparrow running from a bunch of cannibals. This view is used to give us a sense of danger and scope of the problem at hand. If the problem is chasing Jack, and Jack is running towards us, the problem is running towards us too!
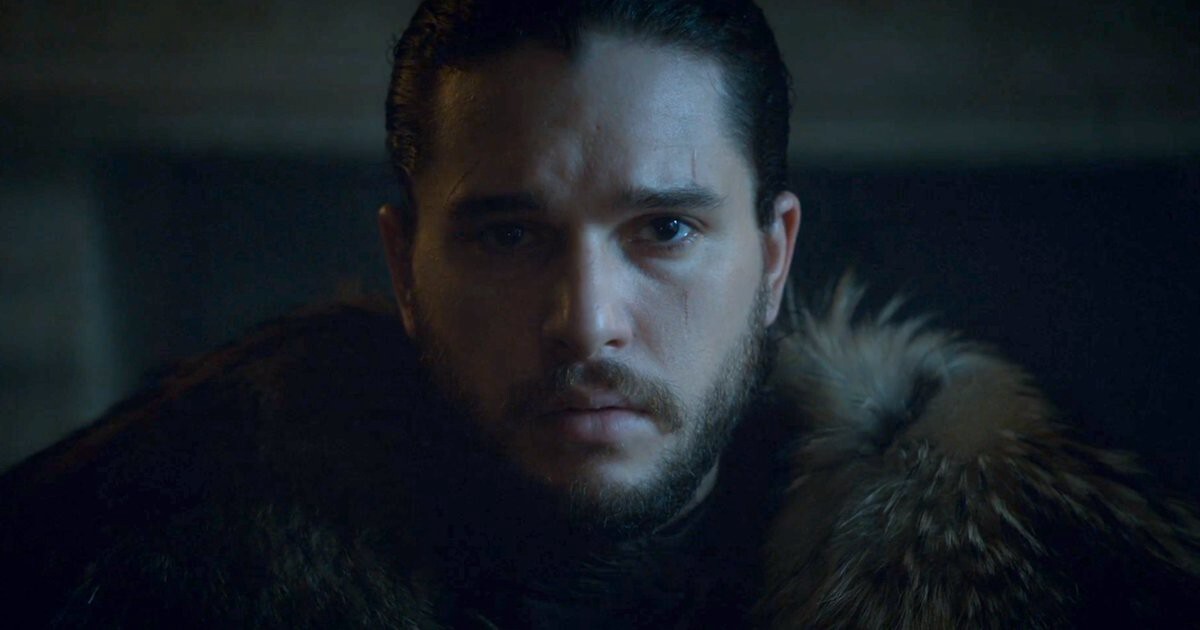
Below, in our Game of Thrones shot, we have a head on shot as a determined and steady gaze. It allows us to look directly into the character, see their expression. Frontal views can be very intimate moments with the characters on screen, so choose wisely when playing with frontal shots!
Three-Quarter View
Between the side and frontal, we have the Three-Quarter shot. These shots are not as personal. We are still involved as an audience, and we can clearly still see the face and front, along with any gestures of the hands (if distance is out far enough). It’s a good shot for being present, and involved, but less personal, less intimate.
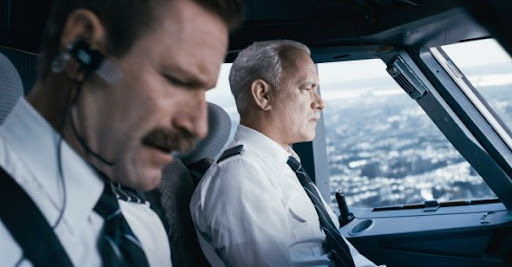
You can also, like any shot, use this as a way to do reverse shots, going back and forth between characters/views. The film Sully uses these 3/4 views often in the cockpit as a way to show both characters together (also called a 2-shot). All shots can be made into 2-shots or have as many characters as you like, so get creative with them!

Because these are less personal than a front shot, but more personal than a 3/4 shot, it's a good choice for something neutral in terms of positioning. Just be mindful of what side the character is facing to keep continuity going, especially when it comes to the 180 Rule, Reverse shots and the Eyeline Match. Those are topics for another day, but keeping direction and side of the screen consistent will be very helpful in the long run. Notice how below in these shots, the position of the camera changes, but the characters stay on the same side of the shot. This is the basis of the 180 Rule.
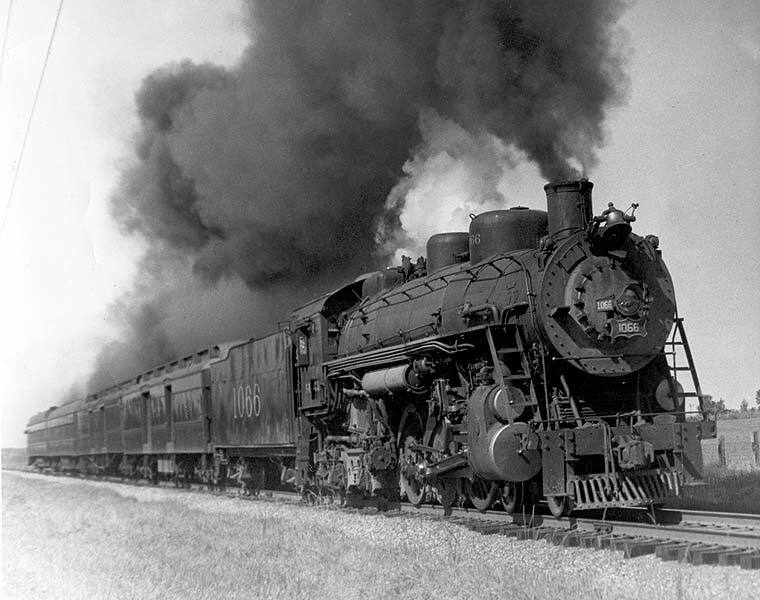
Subjects don't always have to be people/living things. While film is commonly about living things, you can apply all of these techniques to inanimate objects as well. Showing something like a train at a 3/4 angle versus a side or front view is a more interesting shot. Whatever direction the train is going, it will set a footnote in the reader's mind as to where the train is heading. The reader doesn't have to know the destination, but it will set, in the reader's mind if the characters are for example walking to the front or the back of the train. So again, keep direction in mind when planning your backgrounds or environments. Consistency matters!
Side View
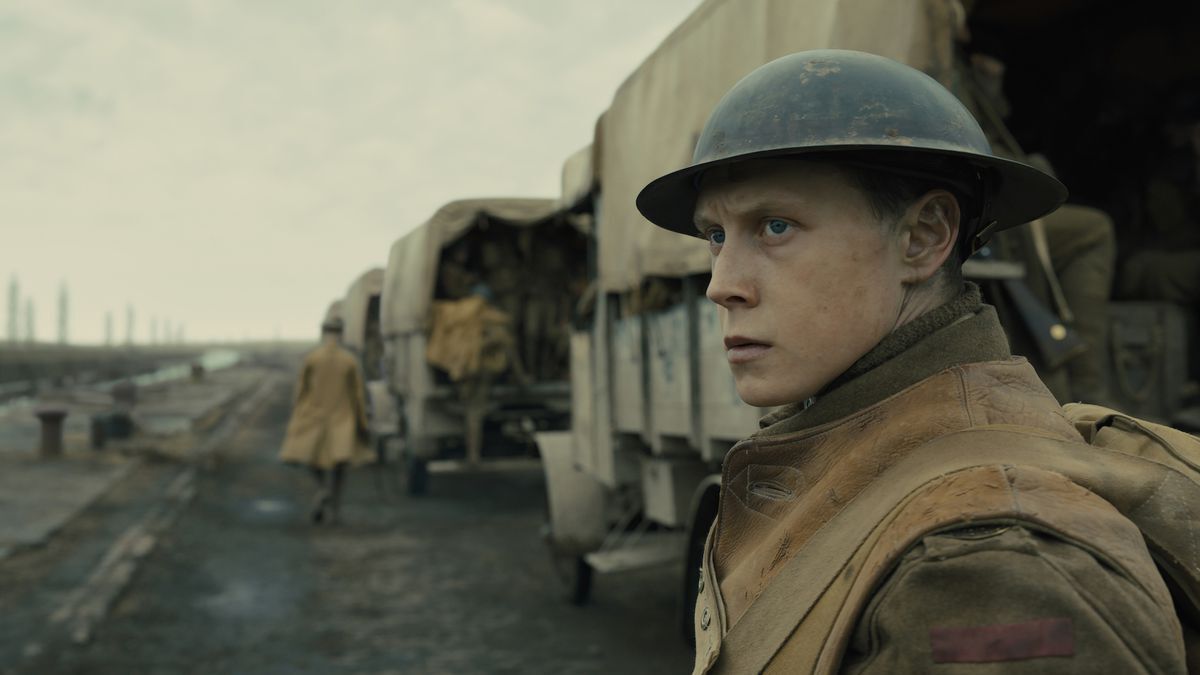
Side views typically are used more as an observant view. We aren’t involved directly at all. We get a limited view of the subjects and silhouettes are even more powerful. Definitely use lighting to your advantage here! In our first shot, we see Ryan and the other trucks lined up down the road. This gives a scale to where Ryan is and gives us details ABOUT where he is while getting to see his uncertain look as he evaluates his situation.
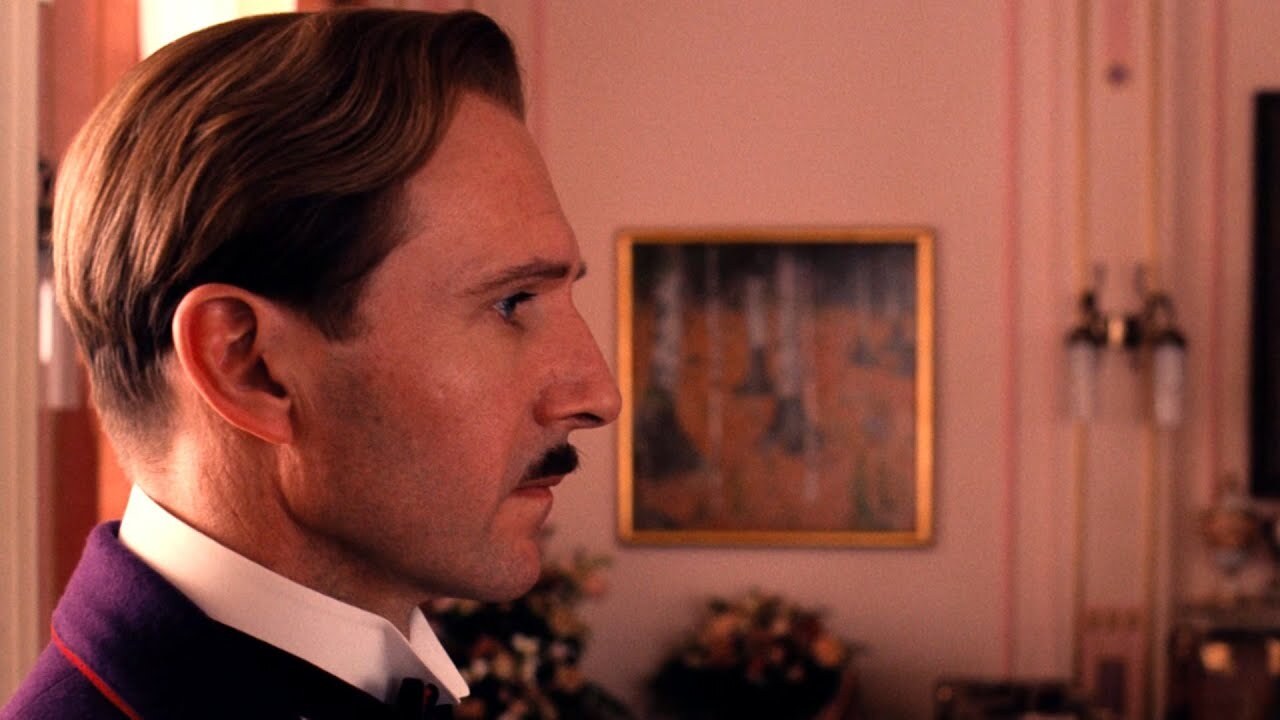
In the shot below, we have a steady, almost blank expression. Our man here is in a stressful situation and needs to remain calm. He has to distance himself emotionally from the situation at hand. We are distanced from him with a side view and made an observer, rather than feeling directly involved. Side views can be used to both give or restrict information, it just depends on how you want to use it!
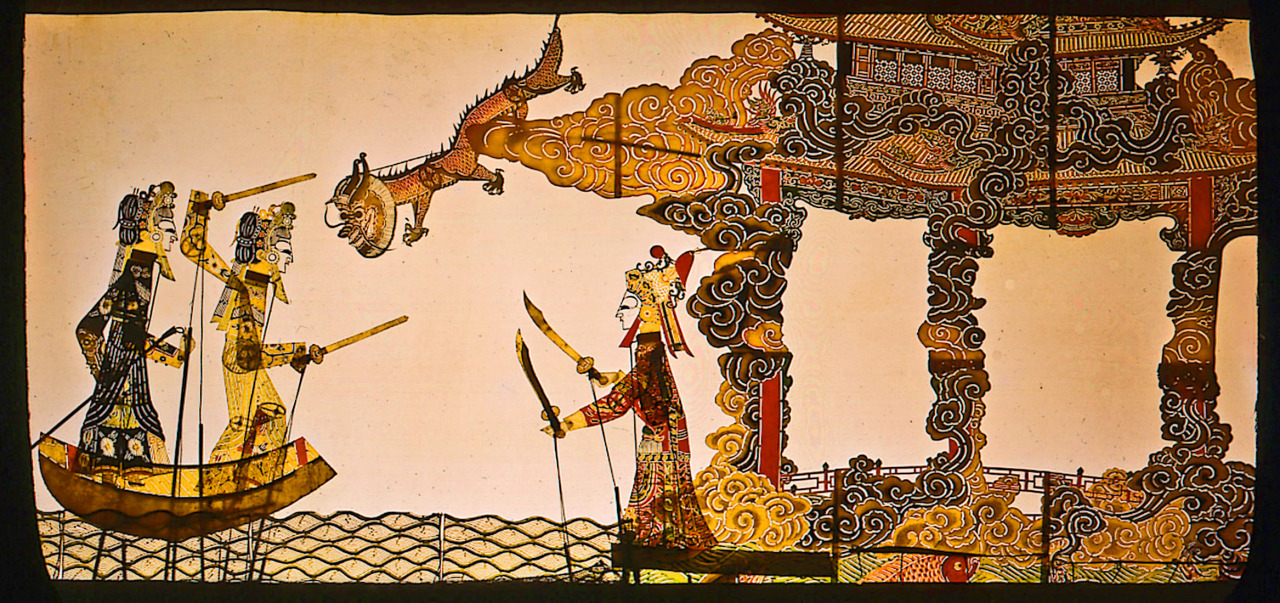
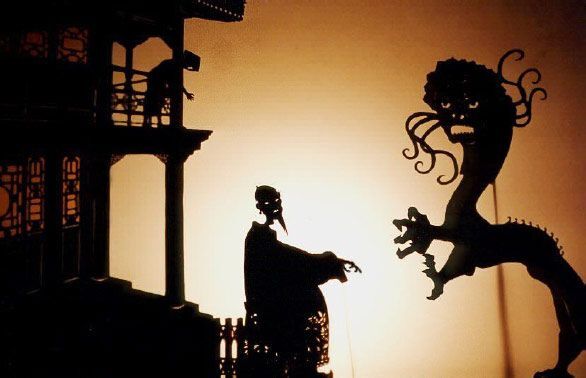
Side shots are also great for silhouette play! We can take a lesson from another storytelling format, shadow/paper puppets in how powerful the profile and side view can be. Shadow puppets are most of the time in front/back view or side view. With side, we can easily manipulate the arms and have characters react to situations better than a front or back. It also allows the character to directly engage with something while looking at what it is engaging with. Some puppets are complex enough to have emotions or facial movements.
The side shot and profile view of characters is a powerful choice for the right moment, but it's easy to over use. Be sure if you intend to use this type of shot in your paneling that you have an intention with why you use it. Just like film, every shot matters, the same is true in comics and manga. Make each shot or panel with a specific purpose!
Over the Shoulder
These shots are technically a camera angle, however the placement of these shots really matter, so I included them here. These are most commonly a back or front version of a Three-Quarter Shot looking over the shoulder; and are great for tension. They allow us to show both the primary subject and who they are interacting with as well as their body language or expression if need be.
You can have as many subjects as you want, but the camera is typically positioned over the shoulder looking at something or someone else. Our shot below from Ray does a great job with this.
One thing to note is that while a lot of over the Shoulder shots are from the back looking towards the front, the opposite is possible as well! This is a great way to build tension by looking over the front of the shoulder towards the back. Play with this type of shot, front to back and back to front for various effects! Another creative shot is using mirrors! This shot below from Harry Potter allows us to look over "Draco's" shoulder while seeing his own reaction. It keeps us directly involved and follows the scene earlier which withheld a lot of information/visuals, so this works as a great reveal shot. (which I won't spoil!).

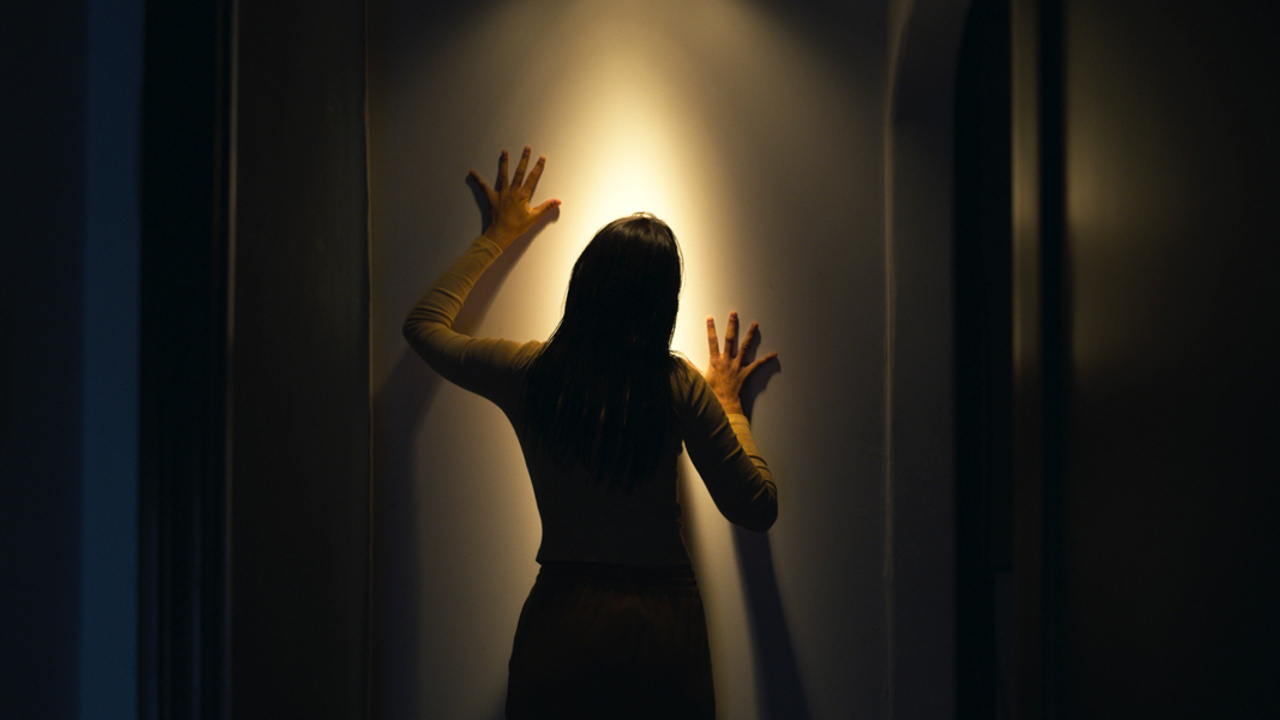
Back / From Behind
These shots are full of uses! If used in a subjective way, the subject of the shot could be seen as turning away from the character, both literally and figuratively. It could infer that the subject is shy, anxious, angry, unwilling to speak or in general is harboring negative emotions. It can also be used, like the example below to up the creep factor by withholding information from the viewer. We can't see her face or what she's doing here, but she's directly engaging with the wall in a way most people don't, at least I don't! So this will pique our interest, wondering what she is doing and why.
What about the 180 Rule?
This is a basic film and animation technique to help ensure that your audience knows where the characters are in the scene. Website “Indie Film Hustle” does a very great job at explaining this concept:
“There’s a lot more to shooting a great scene than just planting a camera somewhere and yelling action. We all want to shoot a scene that can be cut together to achieve great continuity with a good variety of shots.
The 180-degree rule is a cinematography guideline that states that two characters in a scene should maintain the same left/right relationship to one another. When the camera passes over the invisible axis connecting the two subjects, it is called crossing the line and the shot becomes what is called a reverse angle. Reversing the angle is commonly thought to be disorienting and can distract the audience from the intent of the scene.”
We will deeply cover this 180 Rule and the Reverse Shot in our next article, as these can be complicated principles of good storytelling. If you want a head start on next week's lesson, you can check out this article.
A lot of these camera positions might have seemed like obvious choices, however it's not easy to pick the right one for the right time. I hope you have learned about the uses these shots can have and the psychological reasons behind why you choose the shot you choose. A different position or angle can impact the feelings a scene can give off. Feelings the audience gets is as powerful a storytelling tool as the angles we choose, the words we have the characters say, their actions, the colors and mood we set. Placing the camera in the right spot at the right moment will make your scene impactful and that's how you keep your reader interested enough to turn to the next page.
Resources
With all that in mind, I have some more resources here for you to learn from! Next time I'll be covering the 180 Rule, Reverse Shots and the Eyeline match. These are scenes (groups of shots) that you can use for paneling. Direct character/subject interaction can be hard to keep consistent and interesting. I'll give you some answers on how to do that. For now, check out these links for more ideas!
- Difference between Camera Angle and Position by Snapshot Canon (Asia)
- 101 Types of Camera Shots and Angles by Polar Pro Filters
- 16 Types of Camera Shots and Angles (with Gifs) by Boords
- 15 Essential Camera Shots, Angles, and Movements by WolfCrow
Thank you all so much for reading, and I'll see you all next time with Camera Positions! See you soon!
ArtCrumbs and the GlobalComix Team