

Cameras aren’t usually something comic and manga creators think about when we are story boarding, doing layouts or pencils. But why is that? In my personal experience, a lot of those who seek mentorship in this way, especially writers, don’t tend to THINK in this way. We see the story in our own heads, typically as a film or animation. We tend to just replicate what and how we see it and call it a day. But how often do we sit down and critically think about what would be -BEST- for the scene we have versus how we see it in our own minds.
Being able to separate your own personal wants from the work and do what would be best for it, even if what you initially imagine is cool, it might not work best for the work itself. Composing artwork in panels, and then together as a whole page is a two part job:
- Compositions of artwork inside each panel
- Composition of the overall page (and page flow)
Creating pages is an exciting part of making comics. We write and plot and design characters and landscapes, when we want to settle down to make our pages, we have to stop and think about two important factors as we compose each individual panel:
- Camera Angle
- Camera Position
Altering the angle and position can add an extra layer of communication in Visual Narrative. Both factors can alter perceived power, emotion, tension, and the continuity of a scene. Today however we are going to go over Camera Angle and next time we’ll look at Camera Positions.
Let's dig in!
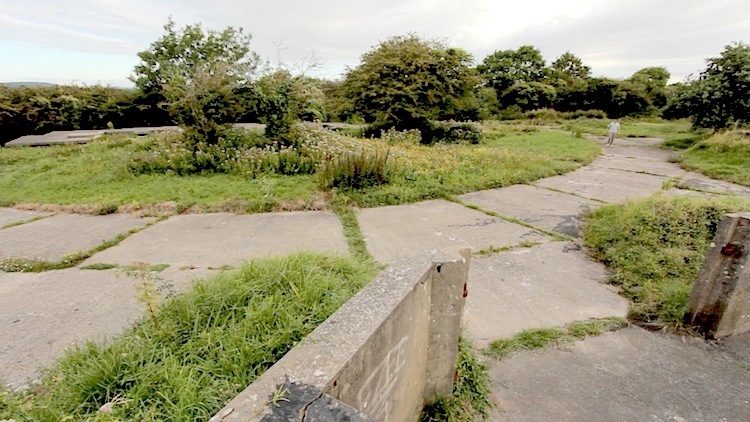
1. High Angle
This shot can have multiple uses and are placed above eye-level. It’s fantastic to establishing shots, a valuable part of your storytelling. It sets the scene you are starting, and typically includes the characters involved and the relationship between characters and objects within the environment as well as the environment itself. You can also set the mood for the establishing scene with the light and colors used. If you use a High Angle for an establishing shot, consider a wide shot or extreme wide for your camera position. I’ll explain what those are later. Here are some samples of establishing shots that use the High Angle:

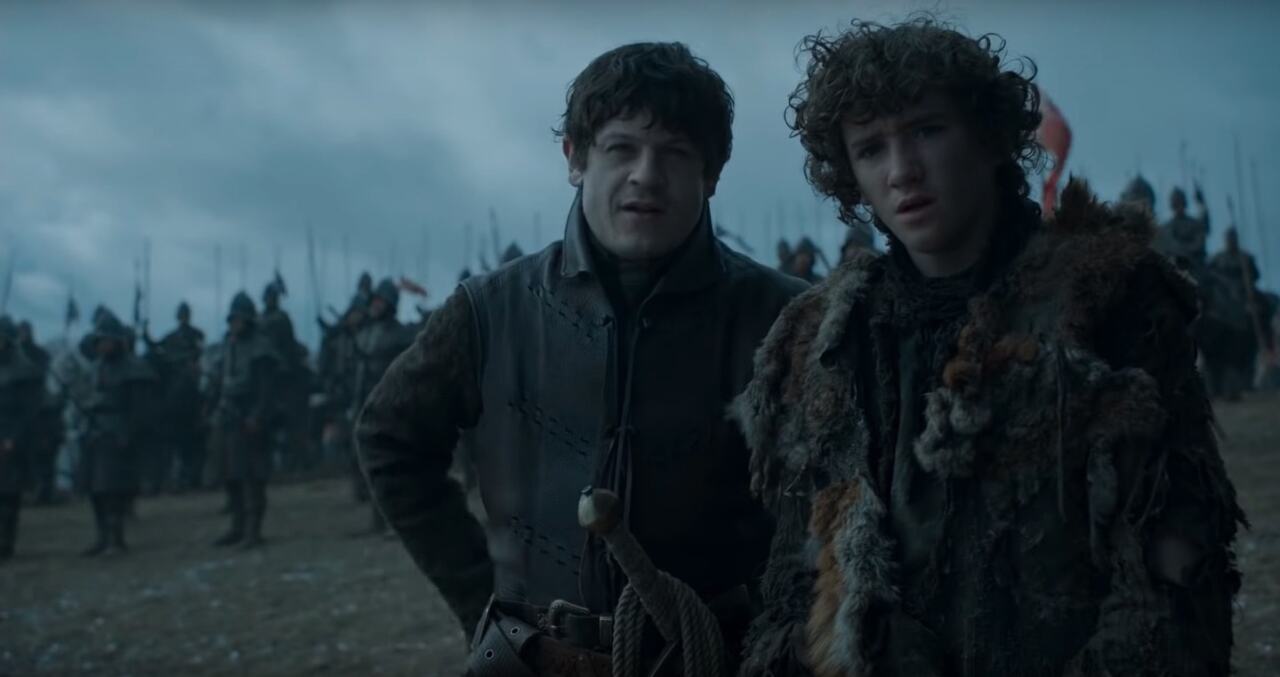
The other use for High Angle shots is to make the subjects in the shot seem less powerful, weaker, less of a threat since we are looking down on the subject. This is a psychological trick that you can use, especially in fight scenes or other dramatic moments. Here are some more examples of how this effect can be used.

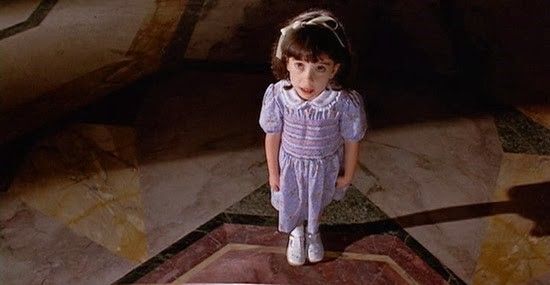
2. Low Angle
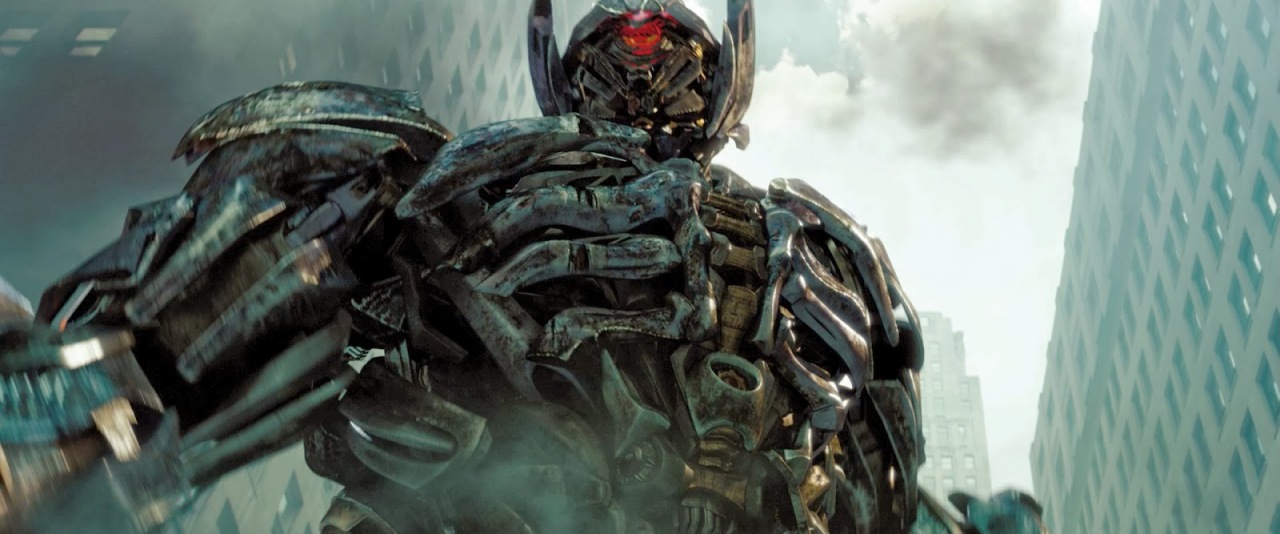
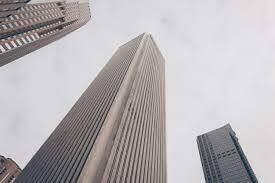
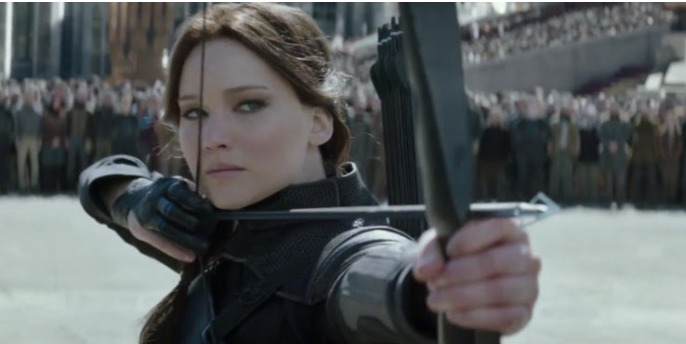
Contrary to the high angle, the low angle looks upwards. It can make the subject of the shot look bigger, more powerful, confident, important, and other positive feelings. Here are some examples of these angles with this positive effect.

A second use here is that looking up at something can also produce negative feelings. Looking up at a subject puts the viewer in the shoes of the cameraman, yes? It can make the subject feel threatening, imposing, and dangerous. This is great for villains, bad guys, and other negative characters and objects when you want there to be tension and put suspense in your viewer.

Lastly, another way to incorporate this is to frame an object the character is looking at and the face of that character. It allows the viewer to make the mental connection that the subject is looking AT something while giving a better perspective than looking at the top of their head instead. You can use other angles with this sort of scene, but this one would likely feel quite natural and is more exciting and interesting than a forward or side view. Sometimes you could call this a wormseye view, which we’ll cover next.
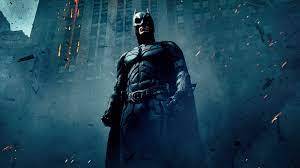
3. Wormseye
This is exactly that! It’s a view that is typically from the ground or floor level of the location. It can also be an angle that looks straight up, not necessarily from the ground. Like the low angle, it can be used for making the subject look tall and powerful. It also doubles as a way to make the viewer feel small and powerless.


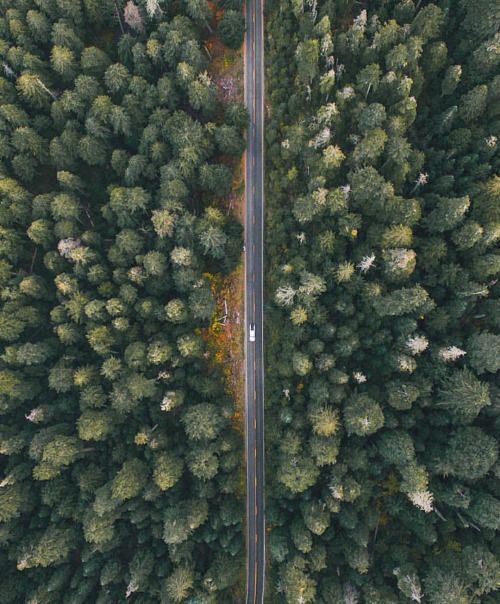
4. Birdseye View
Opposite from the wormseye, this view is typically from above. These can be as wide or as close up as you want them to be and have a variety of uses! They can also serve as wonderful establishing shots, just like the high angle. They are also great for crowds, battles and roads/driving shots.

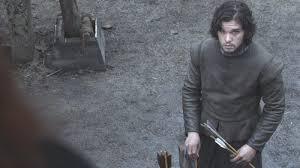
5. Eyeline View
While we have highers and lower shots, the eyeline shot is just that, at eyeline. This is our default way of viewing the world. Most of us are roughly the same height, it places us directly in the action as if we were right next to the characters. It gets your readers directly invovled with what's going on. This is how many of us think when we write and plan, but unfortunately, it plagues the comic world causing a lot of comics to have the same angle over and over again. You can use this shot repeatedly and correctly if you plan for an “eyeline match”, however that's a topic for its own article. Here are some basic eyeline shots:
That's all for now folks! That covers some of the most basic shots that are going to help your panels get more dynamic and creative. There are plenty more angles and next week we can combine these with Camera positions to get some really amazing results! I should had, however, that not every single panel has to have crazy angles and wicked perspective. There are times we need a simpler shot and times we want to enjoy those wild and exciting ones. Knowing when to use each will make you a more efficient storyteller!
Resources
For now, you can read my selection of Resources to learn more about Angles and get a jump start on positions if you please!
- Camera Angles and Positions by Learn About Film
- What is an Establishing Shot? by Studio Binder
- 8 Camera Moves that will help you tell better Visual Stories by NO Film School
- What is an Eyeline Match? by Studio Binder
- The Ultimate Guide to Types of Camera Shots by Studio Binder
- The Psychology of Camera Angles by Photo Workout
Thank you all so much for reading, and I'll see you all next time with Camera Positions! See you soon!
ArtCrumbs and the GlobalComix Team